
Quick Order Forms with updated Advanced Quotes
Guide reviewed October 7, 2026. Use the matching package for your installed nopCommerce version.
If your store uses Advanced Quotes, deploy its compatible Quick Order Forms assembly together with the quote update and restart the application. The shared cart integration preserves approval checks and separates normal form items from negotiated quote lines.
Use reusable forms for supported plain-product ordering. Quotes carrying product configurations, rental dates, or negotiated discount allocations must use direct approved-quote cart copying; conversion explains the limitation rather than silently losing those terms.
Test ordinary form ordering and a configured/discounted quoted cart in the same staging environment. Read the recent quote workflow changes.
Overview
eStoreware Quick Order Forms gives repeat buyers a focused product list instead of requiring them to browse the entire catalog. Forms can be assigned to a registered customer or shared through a secure public link, QR code, printed flyer, email, or desktop shortcut.
Reusable forms
Create one or more order forms for a customer, department, location, or common supply list.
Controlled products
Choose the items shown, default quantities, minimums, case quantities, pricing behavior, and display order.
Multiple access methods
Use My Account, public links, QR codes, email, printed flyers, or Quick Order Snap.
One-click cart building
Customers select quantities and add the form’s requested products into the nopCommerce cart.
Install and configure the plugin
- Install eStoreware Core first and confirm the eStoreware dashboard loads.
- Install eStoreware Quick Order Forms from nopCommerce Local plugins.
- Restart or reload the application when prompted.
- Open eStoreware → Licensing, activate the Quick Order Forms license, and validate it.
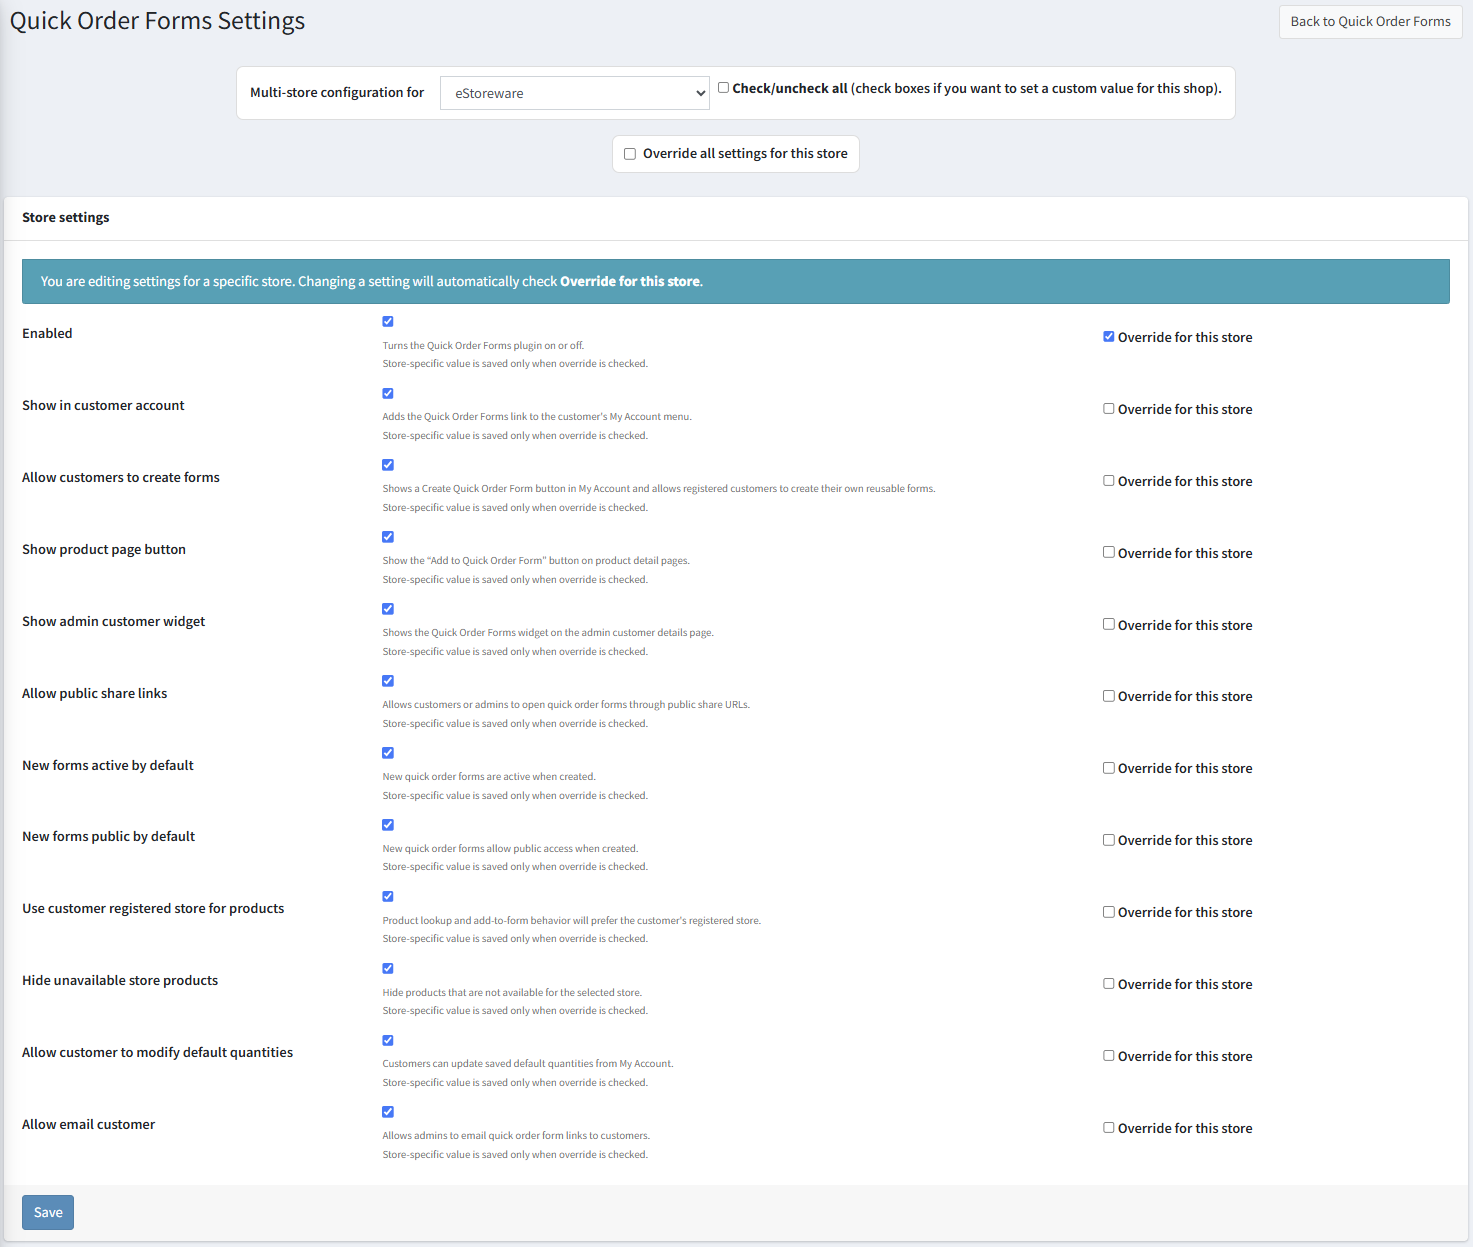
- Open the Quick Order Forms settings page and review store, product-visibility, quantity, and email options.
- Confirm the required customer role permissions through Manage ACL.
Recommended settings review
| Setting | Purpose |
|---|---|
| Use customer registered store for products | Uses the customer’s registered store context when loading products for the form. |
| Hide unavailable store products | Prevents products unavailable to the selected store from appearing on the customer form. |
| Allow customer to modify default quantities | Allows the buyer to change the quantities initially assigned to form items. |
| Allow email customer | Enables administrator email workflows for sending form links or setup instructions. |
Create a Quick Order Form
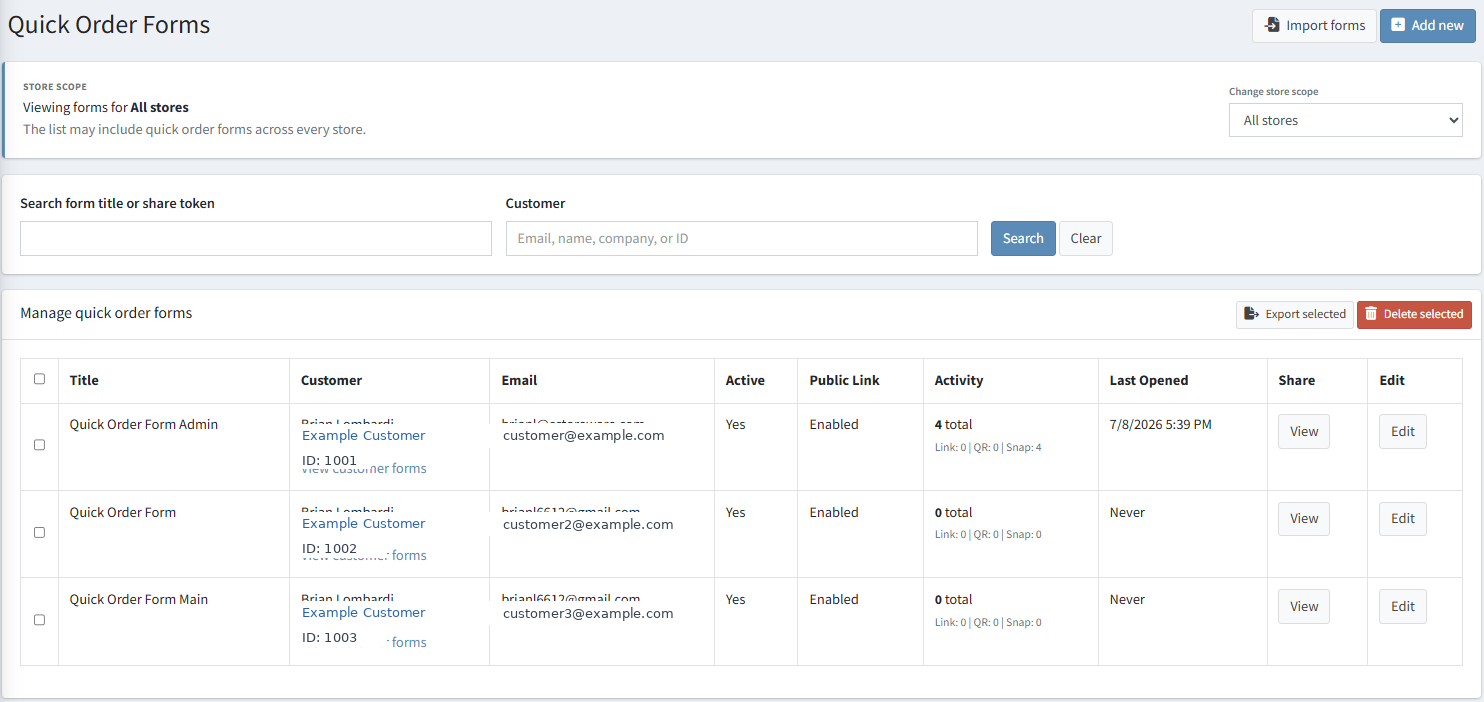
- Open Administration → eStoreware → Quick Order Forms.
- Select Add new or the equivalent create action.
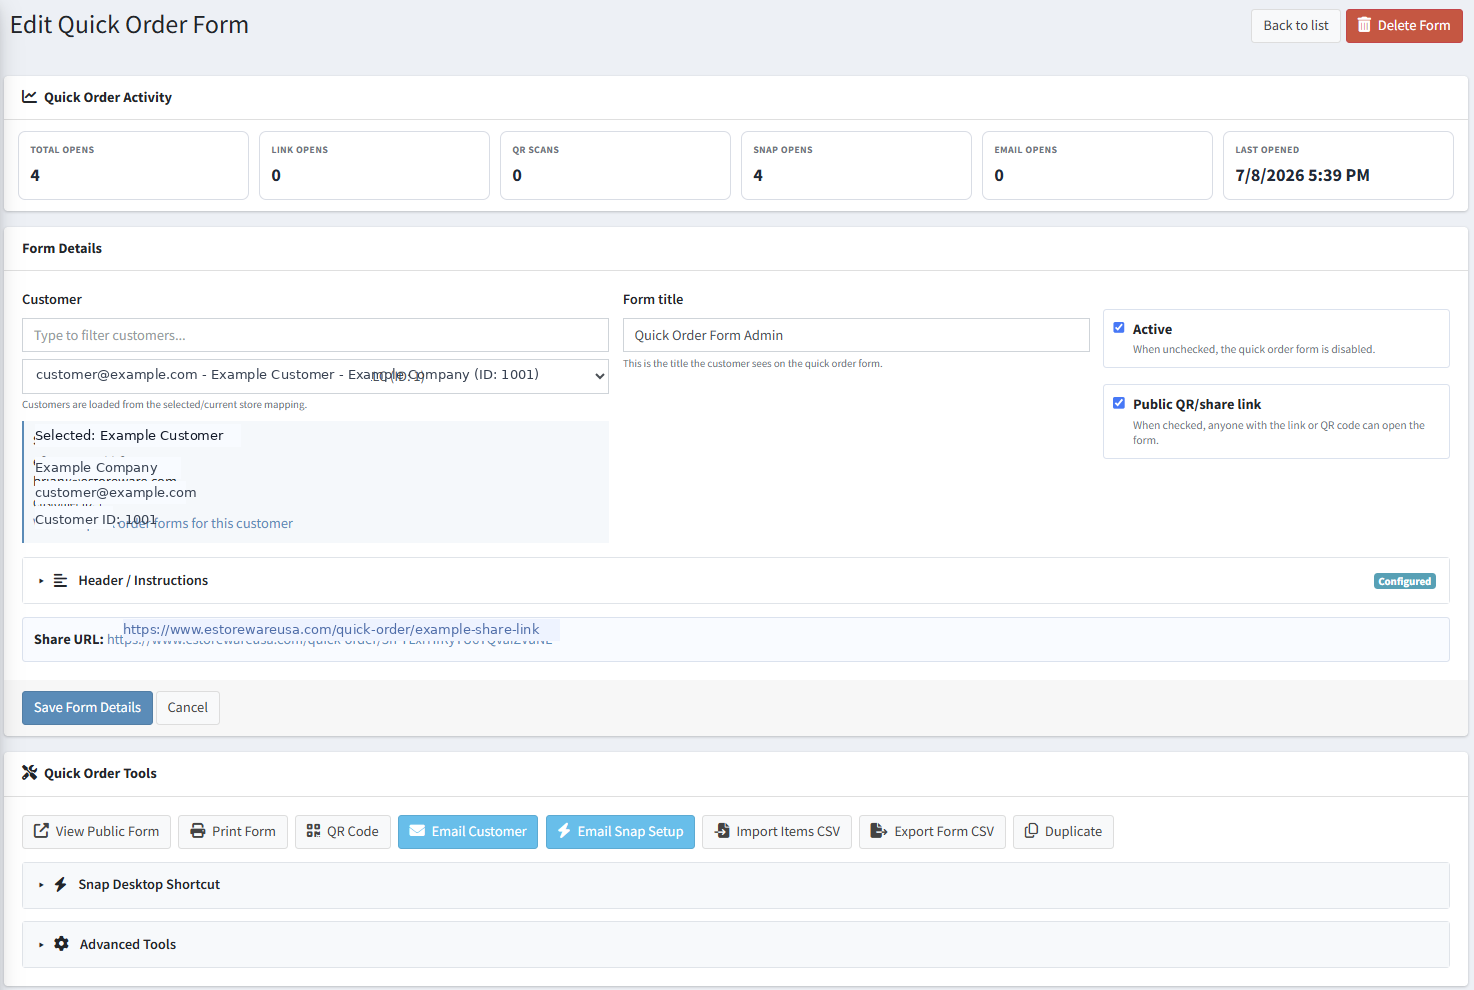
- Enter a clear internal and customer-facing form name.
- Select the customer when the form should appear in that customer’s My Account area.
- Select the store when the installation uses multiple nopCommerce stores.
- Enable the form and configure public sharing only when outside access is required.
- Save the form before adding products or generating share tools.
Add and edit form products
Add products from the form editor
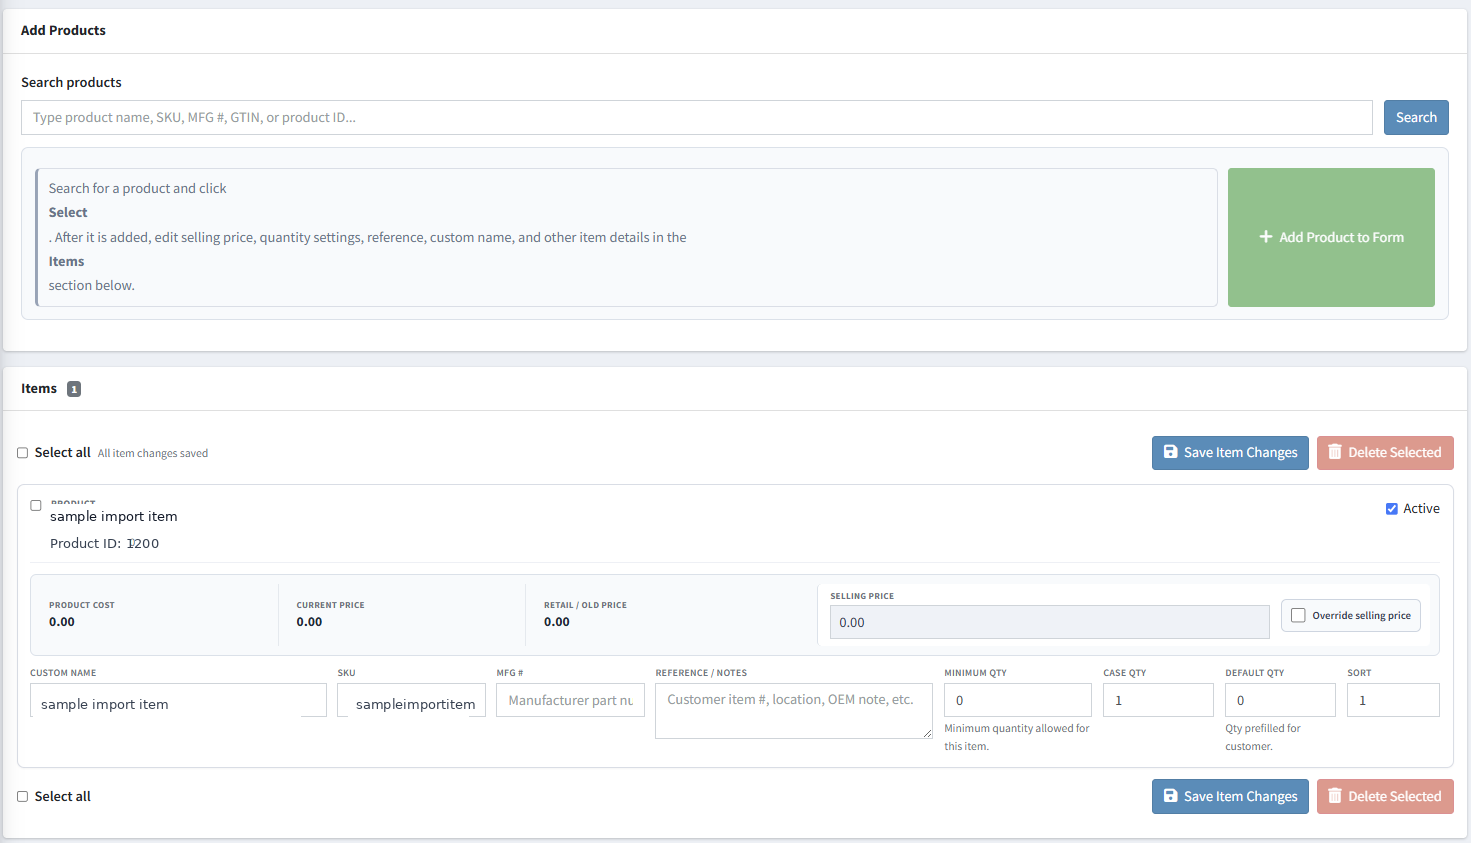
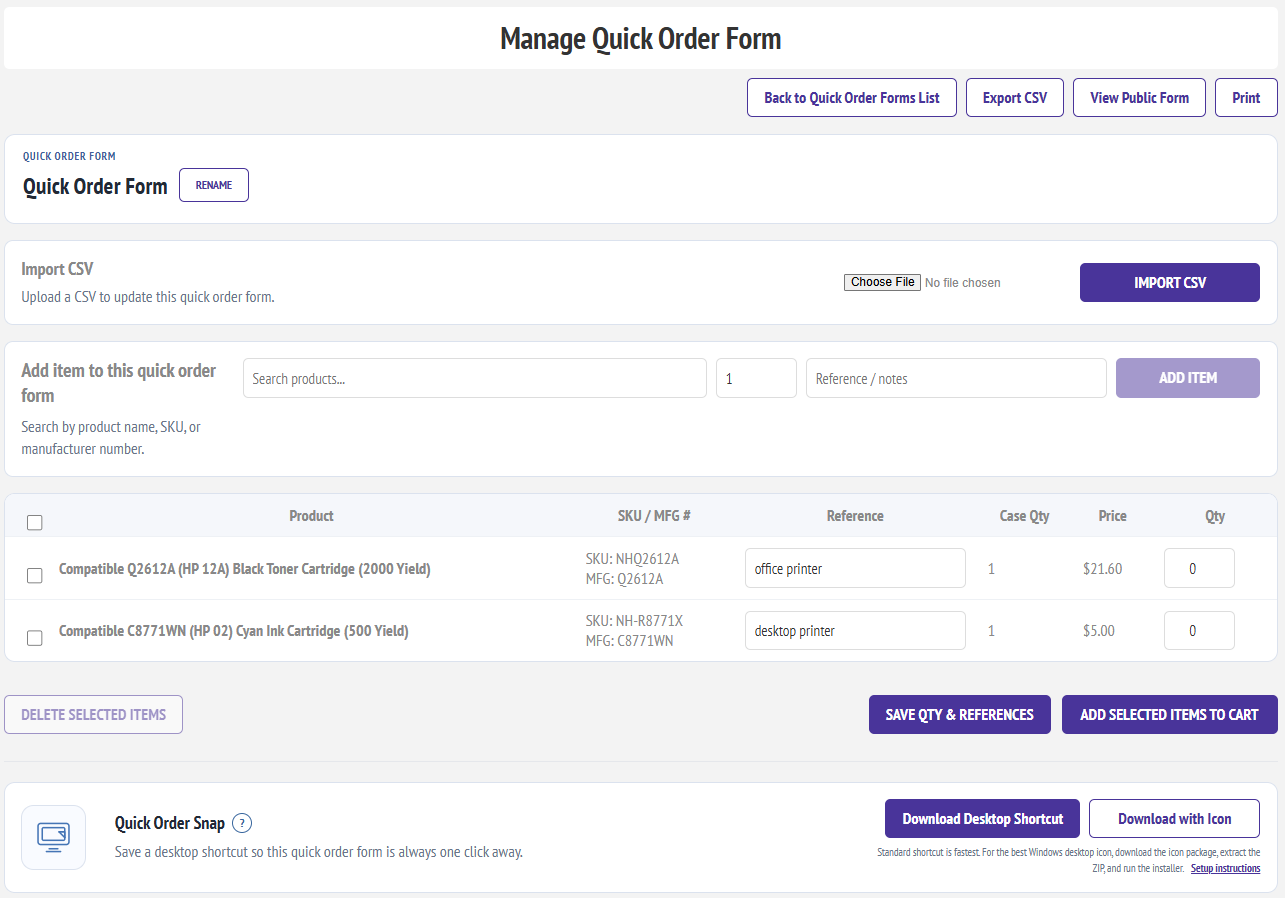
- Open the saved form and use the product lookup or search control.
- Select the product and any required attribute combination.
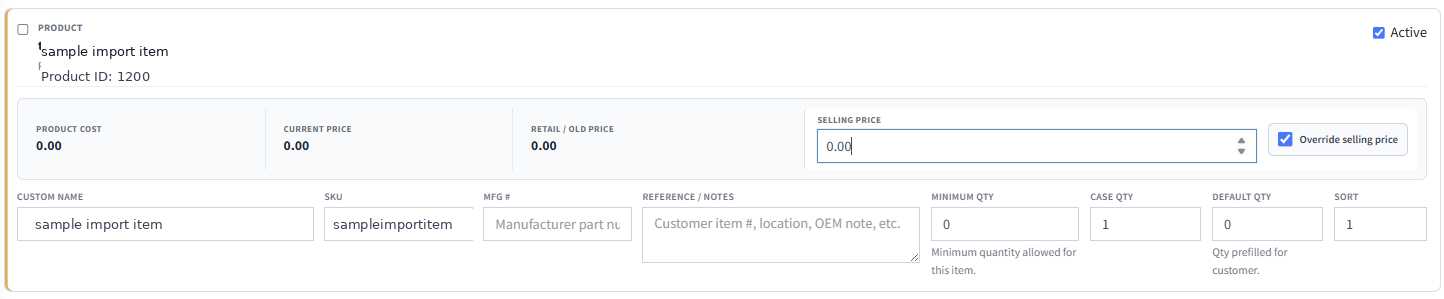
- Set the default order quantity, minimum quantity, case quantity, reference, display order, and active status as needed.
- Keep original pricing enabled when the customer should receive the normal nopCommerce price.
- Use a price override only when the form requires a controlled selling price.
- Save the item and repeat for the remaining products.
| Item field | How it is used |
|---|---|
| Use original price level | Uses the price calculated by nopCommerce for the customer and store. |
| Price override | Uses a form-specific selling price when configured and allowed. |
| Cost | Administrative reference for product cost; it is not the customer selling price. |
| Retail / old price | Optional comparison or reference pricing when supported by the form display. |
| Case quantity | Identifies the normal case-pack quantity for the product. |
| Minimum quantity | Prevents ordering below the configured quantity. |
| Default order quantity | Preloads the quantity shown when the customer opens the form. |
| Reference | Adds a customer-friendly note, room, machine, department, or internal reference. |
| Display order | Controls the order in which items appear. |
| Active | Controls whether the item is available on the form without deleting it. |
Customer and public access
Registered customer access
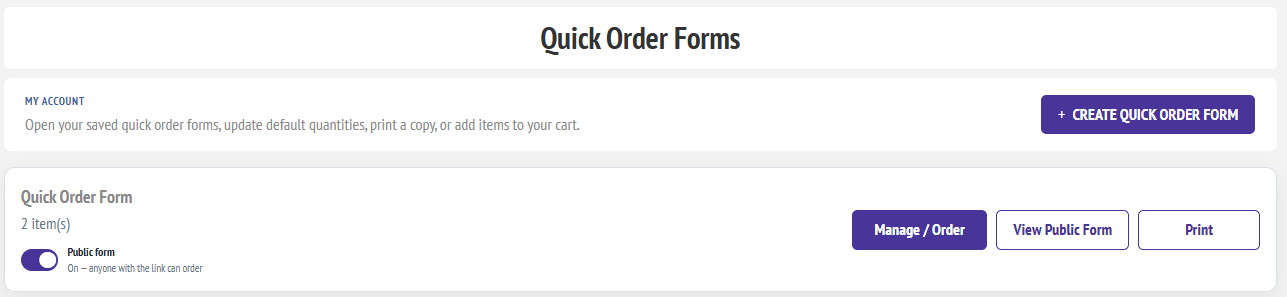
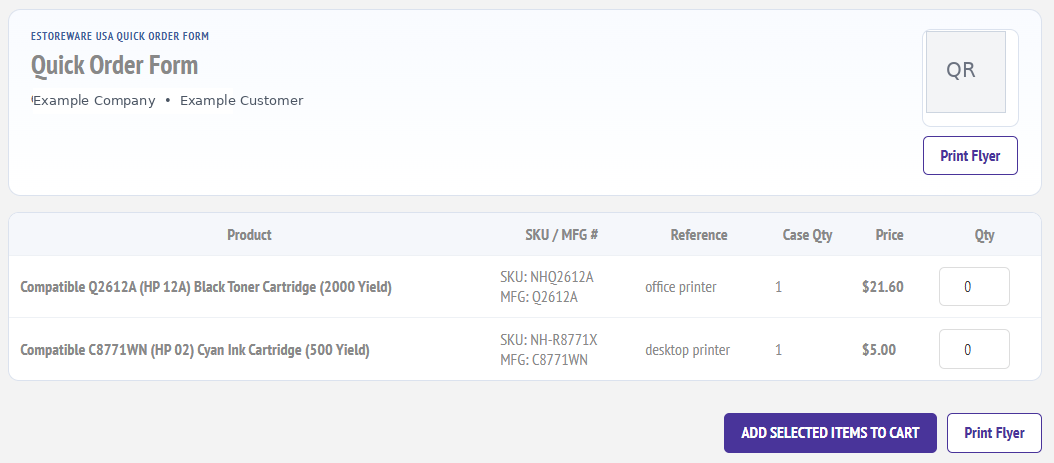
Assigned forms appear in the customer account under the Quick Order or Quick Order Forms menu. The customer opens the form, enters quantities, and adds the selected items to the cart.
Public form access
Enable public sharing when a buyer should open the form without first navigating through My Account. Use the generated share token and public URL rather than exposing an administrative form-edit URL.
- Regenerate a public link if the old link should stop working.
- Do not expose customer account navigation on a public form.
- Test the public page while signed out and in a private browser window.
- Confirm the form loads products from the intended store.
- Confirm unavailable or restricted products follow the configured visibility settings.
Share by QR code, email, print, and Quick Order Snap
QR code
- Open the form’s administrative tools.
- Confirm public sharing is enabled and the share link is current.
- Generate or download the form QR code.
- Scan it from a phone that is not signed in to the administration area.
- Confirm it opens the intended public form and store.
Email customer
Use the email action to send the customer a direct form link, QR instructions, or Quick Order Snap setup information. Confirm the store’s SMTP configuration is working before relying on automated delivery.
Printable flyer
Create a printable handout containing the form name, instructions, public link, and QR code. Print or save the flyer as PDF for customer onboarding, supply rooms, classrooms, or purchasing desks.
Quick Order Snap desktop shortcut
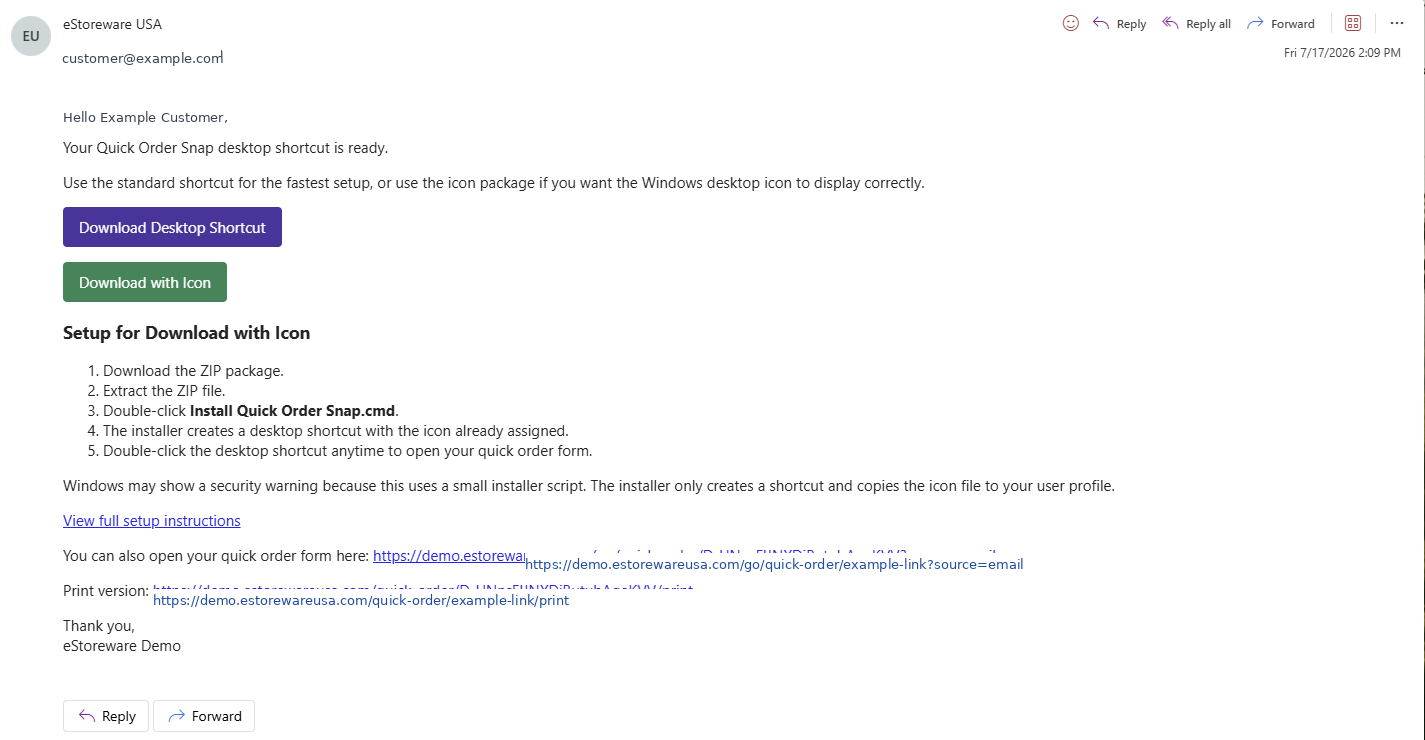
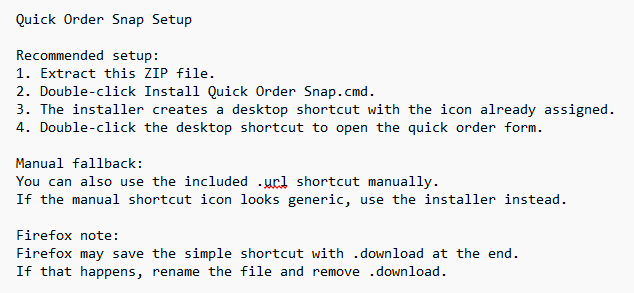
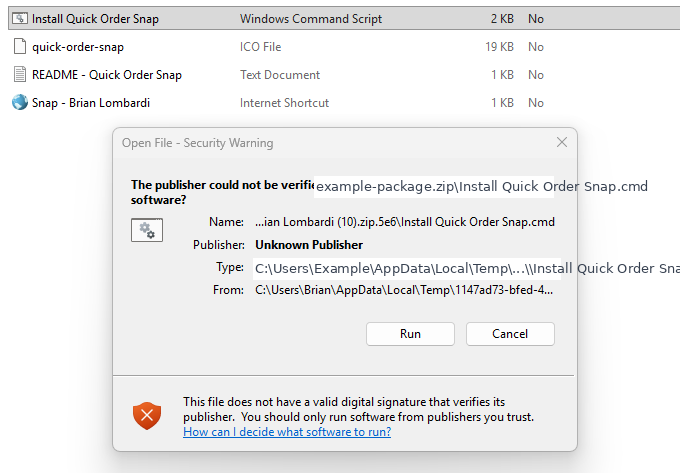
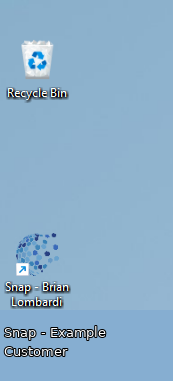
Quick Order Snap creates a Windows desktop launch package so a customer can open the assigned form without remembering a URL. The package may include an installer script, icon file, instructions, and an internet shortcut.
- Open the form’s Snap or desktop shortcut action.
- Confirm the public URL and custom icon information.
- Download the generated package and review the included README.
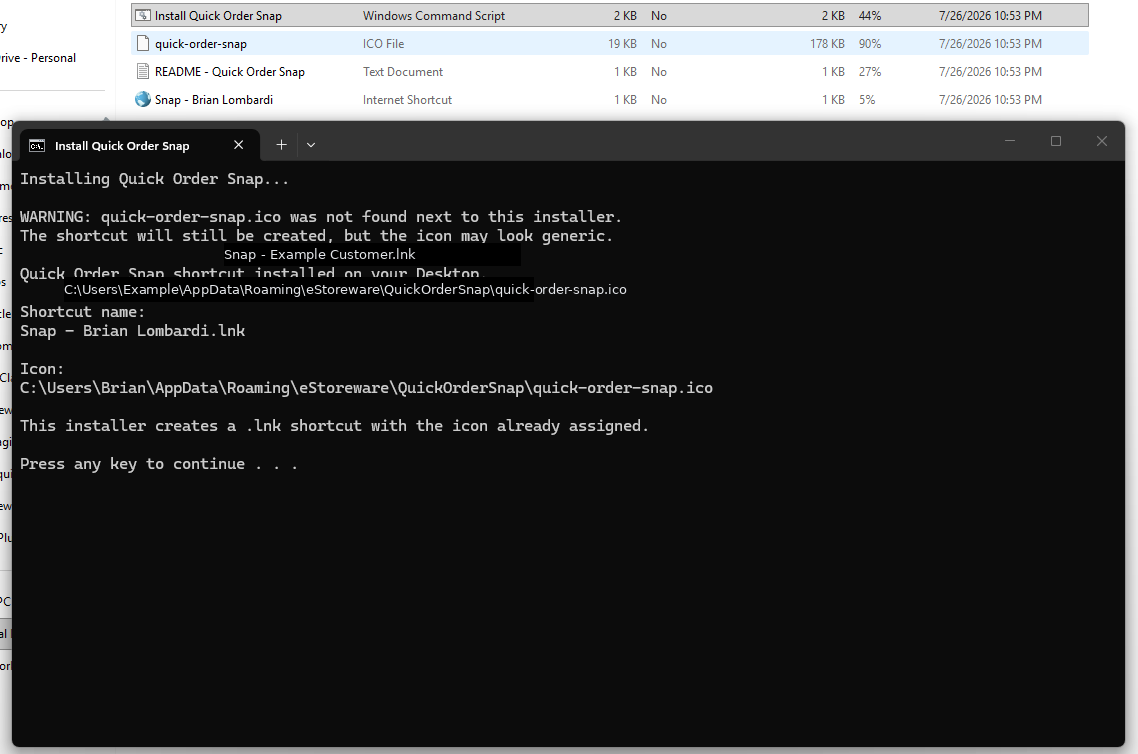
- Run the installer on a test Windows workstation.
- Confirm the shortcut icon appears and opens the correct form.
- Send the tested package and setup instructions to the customer.

Import and export form items with CSV
CSV tools are useful when a form contains many products or when an existing product list is being moved into Quick Order Forms. Export a working form first whenever possible so the file structure and field names match the installed plugin version.
Recommended import workflow
- Create and save the destination form.
- Export a sample form or download the current template.
- Keep the original column headings unchanged.
- Add product identifiers and supported item settings.
- Import a small test file before importing the complete list.
- Review the preview, warnings, skipped rows, and matched products.
- Open the form and verify prices, quantities, attributes, references, and display order.
Add products from the storefront product page
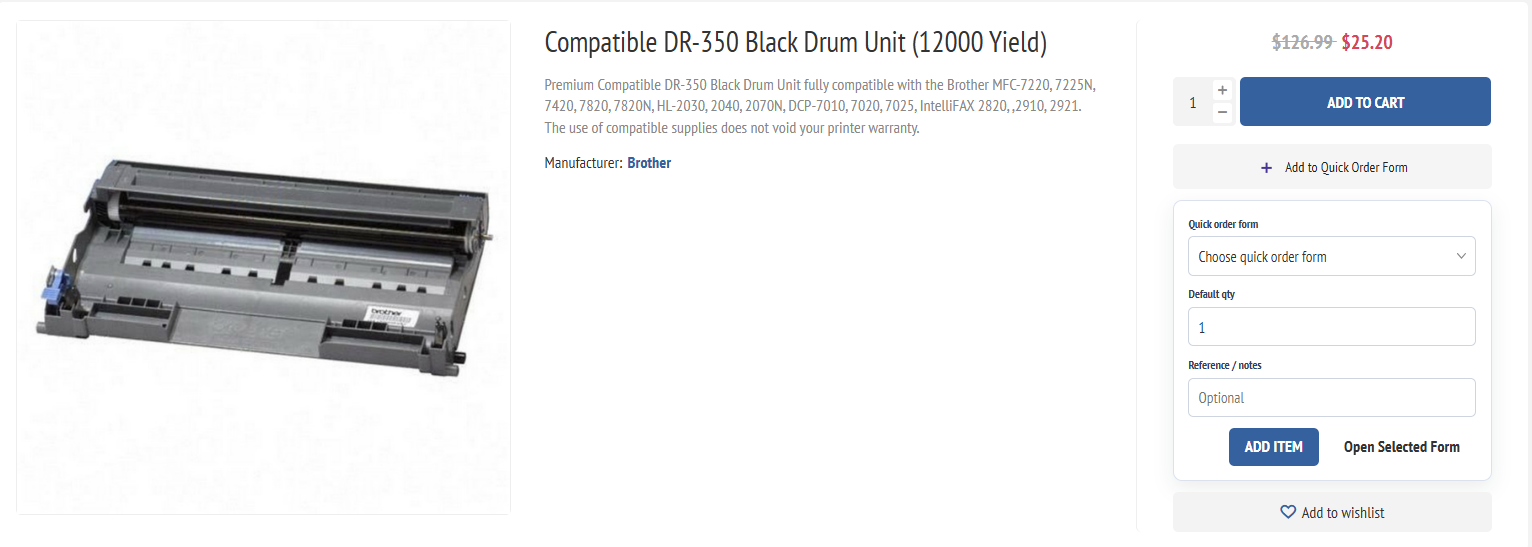
When the product-page integration is enabled, an authorized customer can add the current product directly to one of their Quick Order Forms.
- Open a product details page while signed in as an eligible customer.
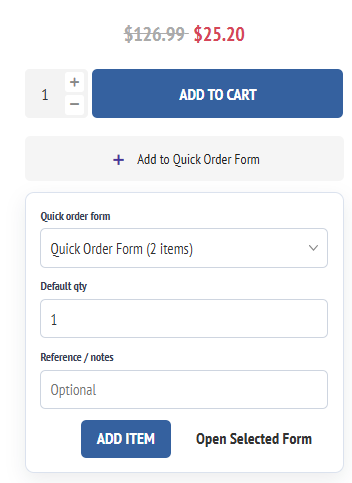
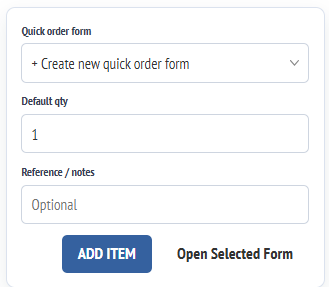
- Choose the destination form from the Quick Order Form dropdown.
- Enter the default quantity and optional reference.
- Select Add Item.
- Open Manage Forms to review or edit the form.
Review tracking and administrative tools
Form tracking can help administrators understand how customers reach and use their forms. Depending on the installed version, the list can include total opens, link opens, QR scans, Snap opens, email opens, and the most recent activity.
| Tool | Use |
|---|---|
| Duplicate | Creates a starting copy for another customer, department, or location. |
| Regenerate link | Replaces the current public share token when the previous URL should no longer be used. |
| Sends the form link or onboarding instructions to the customer. | |
| Print / flyer | Creates an offline handout with the link and QR code. |
| Import / export | Moves form-item data through the supported CSV structure. |
| Delete | Removes the form after confirming it is no longer required. |
Troubleshooting
The customer cannot see the form
- Confirm the form is active and assigned to the correct customer.
- Confirm the customer has permission to use Quick Order Forms.
- Review the selected store and customer registered-store setting.
- Sign out and sign back in after role or customer assignment changes.
The public link does not work
- Confirm public sharing is enabled.
- Regenerate the link and test the newest URL.
- Test while signed out in a private browser window.
- Confirm the form is active and the site URL is correct.
Products are missing
- Confirm the form item is active.
- Review store mapping, ACL, product publication, and availability.
- Review the setting that hides unavailable store products.
- Confirm the required product attribute combination still exists.
The cart price is not the expected form price
- Confirm Use Original Price Level and Price Override are configured correctly.
- Review quantity tiers, customer roles, discounts, tax settings, and currency.
- Test standard cart, one-page checkout, guest-cart migration, and final order creation.
- Confirm the Quick Order shopping-cart service replacement is registered and the application restarted after deployment.
The Snap shortcut opens the wrong page
- Regenerate the package after changing the public link or domain.
- Remove the old desktop shortcut before installing the replacement.
- Inspect the generated internet shortcut URL and test it directly.
Return to Plugin Documentation, review the Quick Order Forms feature page, or contact eStoreware support.
Back to top ↑